

Free Mellotron Choir Instrument Rack | Beat Lab Exclusive
The mellotron is now a classic, vintage instrument that made its mark on legendary tracks like The Beatles' "Strawberry Fields Forever" and David Bowie's "Space Oddity". The instrument had a spacey and haunting vibe that hadn't been heard before in the 1960s. It behaved like a pre-cursor to our modern samplers as well. Sound was created by a section of magnetic tape connected to the keys that would playback when a key or keys were depressed, and playback would then stop when the keys were released. This allowed for a variety of sounds depending what instrument or sound was recorded onto the magnetic tape. The mellotron was designed to replicate the sound of the original instrument, but replaying a tape created minor fluctuations in pitch and amplitude.
So a note sounded slightly different each time it was played. How hard a player hit a key affected the sound as well. Another distinction in the sound of the mellotron was that each "sampled" note was recorded in isolation and so the sound had hints of being natural and unnatural at the same time.
5 Arpeggiator Techniques + Free Cheat Sheet
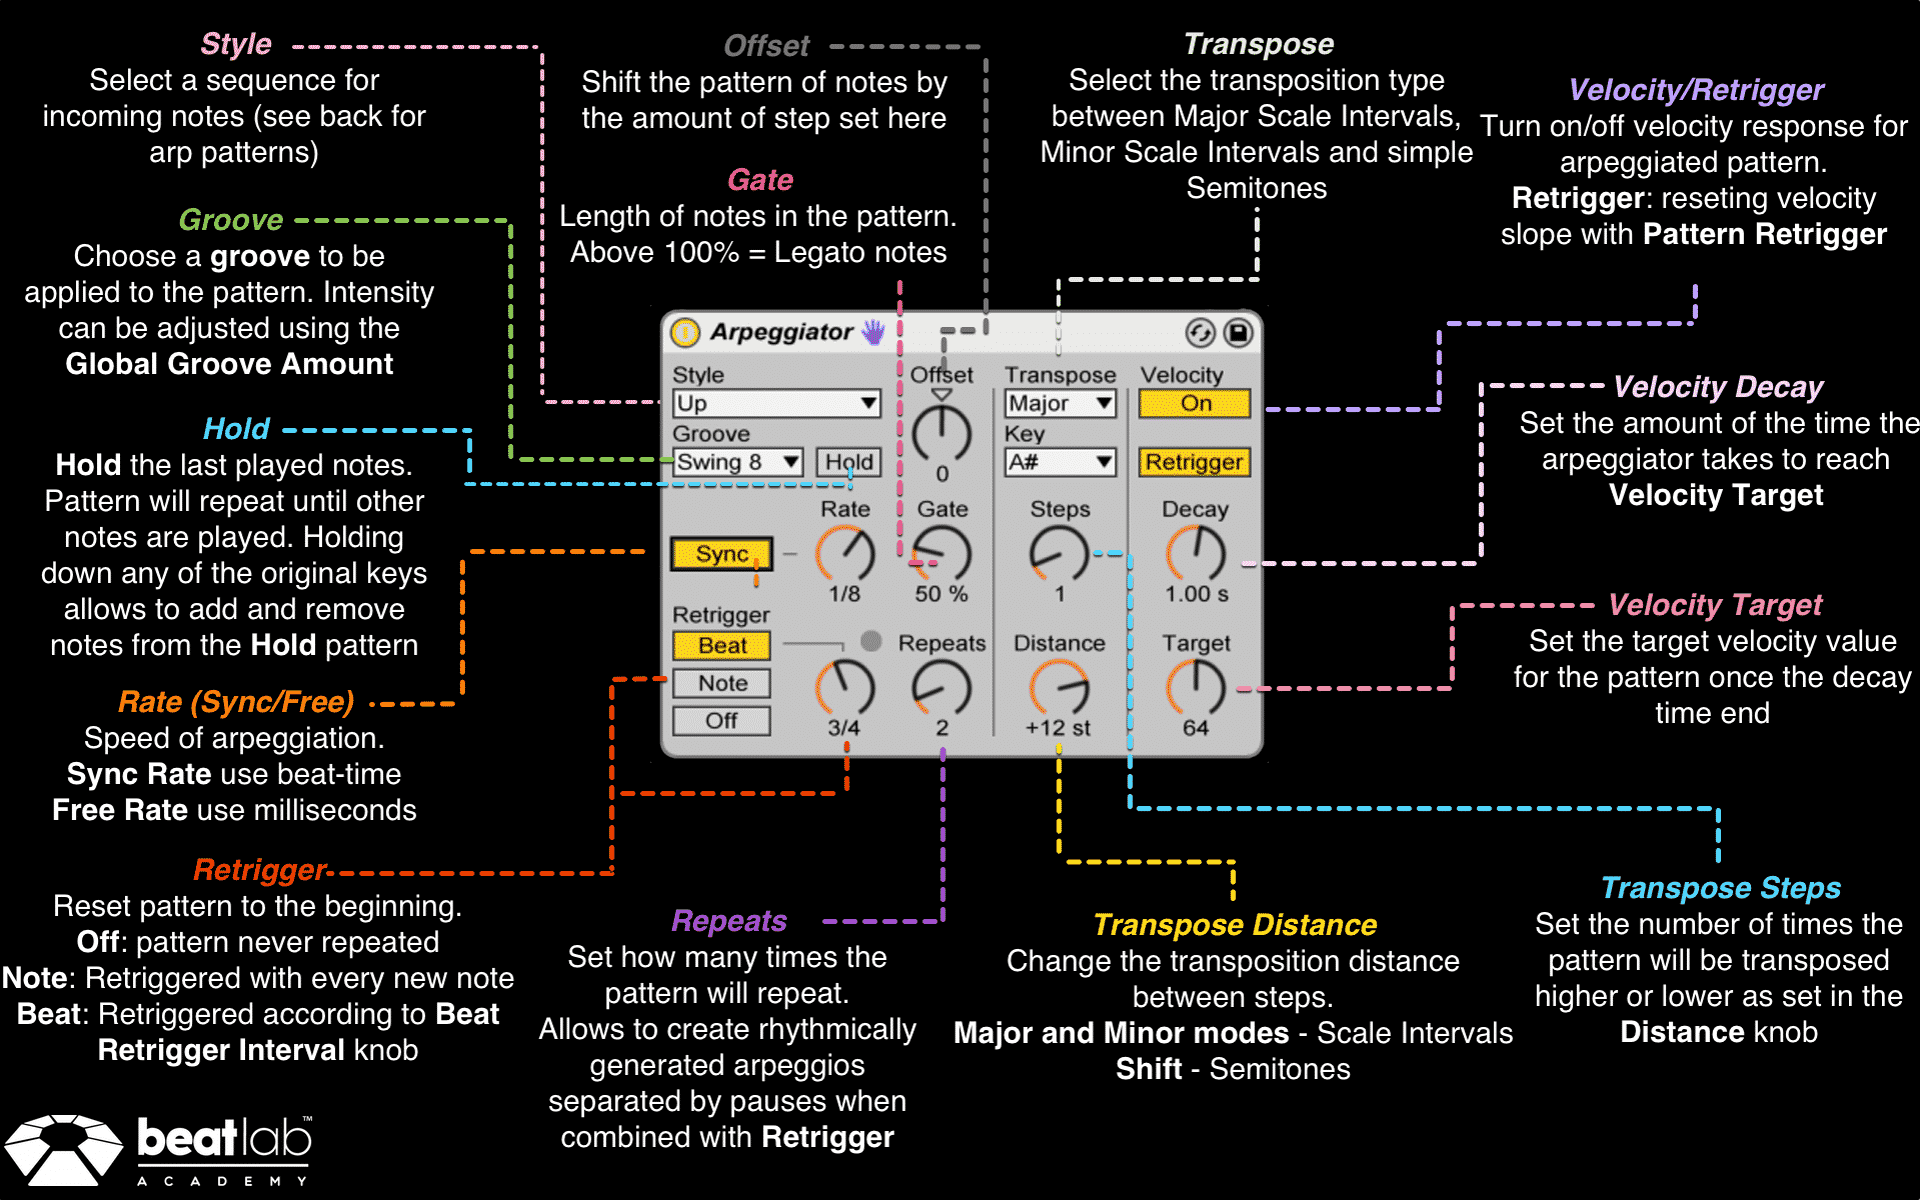
5 Arpeggiator Techniques + Free Cheat Sheet We continue with our Ableton Effects cheat sheet series. Check out the previous cheat sheets and techniques by CLICKING HERE. The entire collection is available to Beat Lab students and alumni. Up until now we shared many techniques and cheat sheets cover the audio effects in Ableton Live. The Arpeggiator is the first MIDI effect we tackle. Because it’s a MIDI effect, it must come before an instrument. It does not make a sound on its own but only change the incoming MIDI signals. It can be a very powerful tool to create melodic sequences, basslines, arp textures and percussion phrases and fills. In the most simple form, it can even act as a note repeater. Let’s check out a few ideas of what to do with it. divider style=”clear” Instant Fills Arpeggiator in Random Style can help you create some awesome …
Read More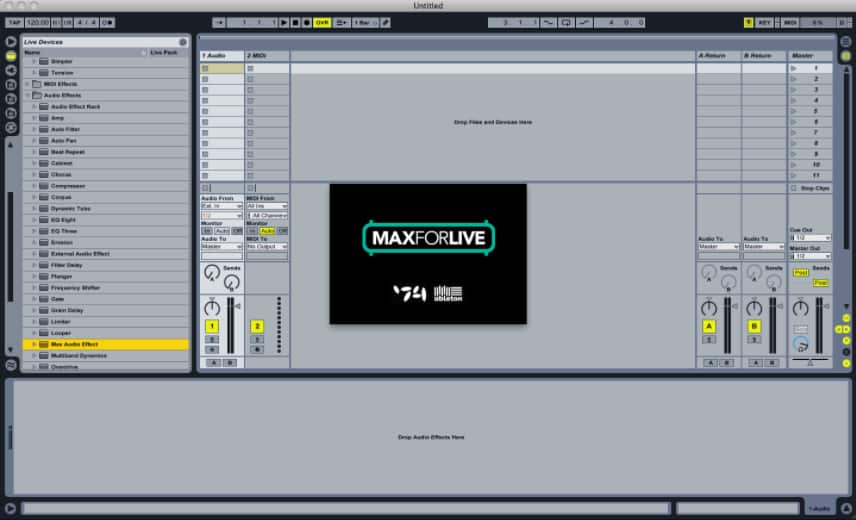
6 New Free Max for Live Devices You Should Know About
6 Free Max for Live Devices You Should Know About The free online library Maxforlive.com is getting bigger by the day. It might be hard to tell which devices you should download and how they can help with your productions. Here are 6 free Max for Live devices you should check out: divider style=”clear” Nylon – Strum Your MIDI This device is a one-note-chord MIDI effect with a twist. It allows you to delay each note to emulate a strum. You can change the Speed, Curve, Velocity and randomize the strum for an authentic sound. You can even make a pattern of chords and trigger them with one note. Very easy to use. Just place on a MIDI track followed by an instrument and start hitting notes. DOWNLOAD HERE and check out other cvolm Max for Live devices HERE divider style=”clear” Trigg.Me – Tap Your Computer to Trigger MIDI These …
Read More
Sound Recipes #3: Future House Bass (Free Download)
Sound Recipes #3: Future House Bass https://www.youtube.com/watch?v=qKnVMKsbp2U You can check out previous Sound Recipes HERE This type of sound uses Frequency Modulation (FM) to get a plucky metallic sound. We will use 3 layers inside an Instrument Rack: Low Mid wide FM Bass Mid-High Distorted FM Bass Sub Layer We’ll be using Operator exclusively to create all the layers of the sound divider style=”clear” Low Mid wide FM Bass By default, Operator function as an FM synth which is exactly what we want. Meaning that only Oscillator A is audible. Oscillators B, C & D do not output any sound but rather alter the sound with Frequency Modulation. It is common to use Sine waves for FM synthesis and we’ll stick with those. Turn up OSC B volume until you hear the sound change. Now you can adjust the Envelope to be shorter to give us that pluck …
Read More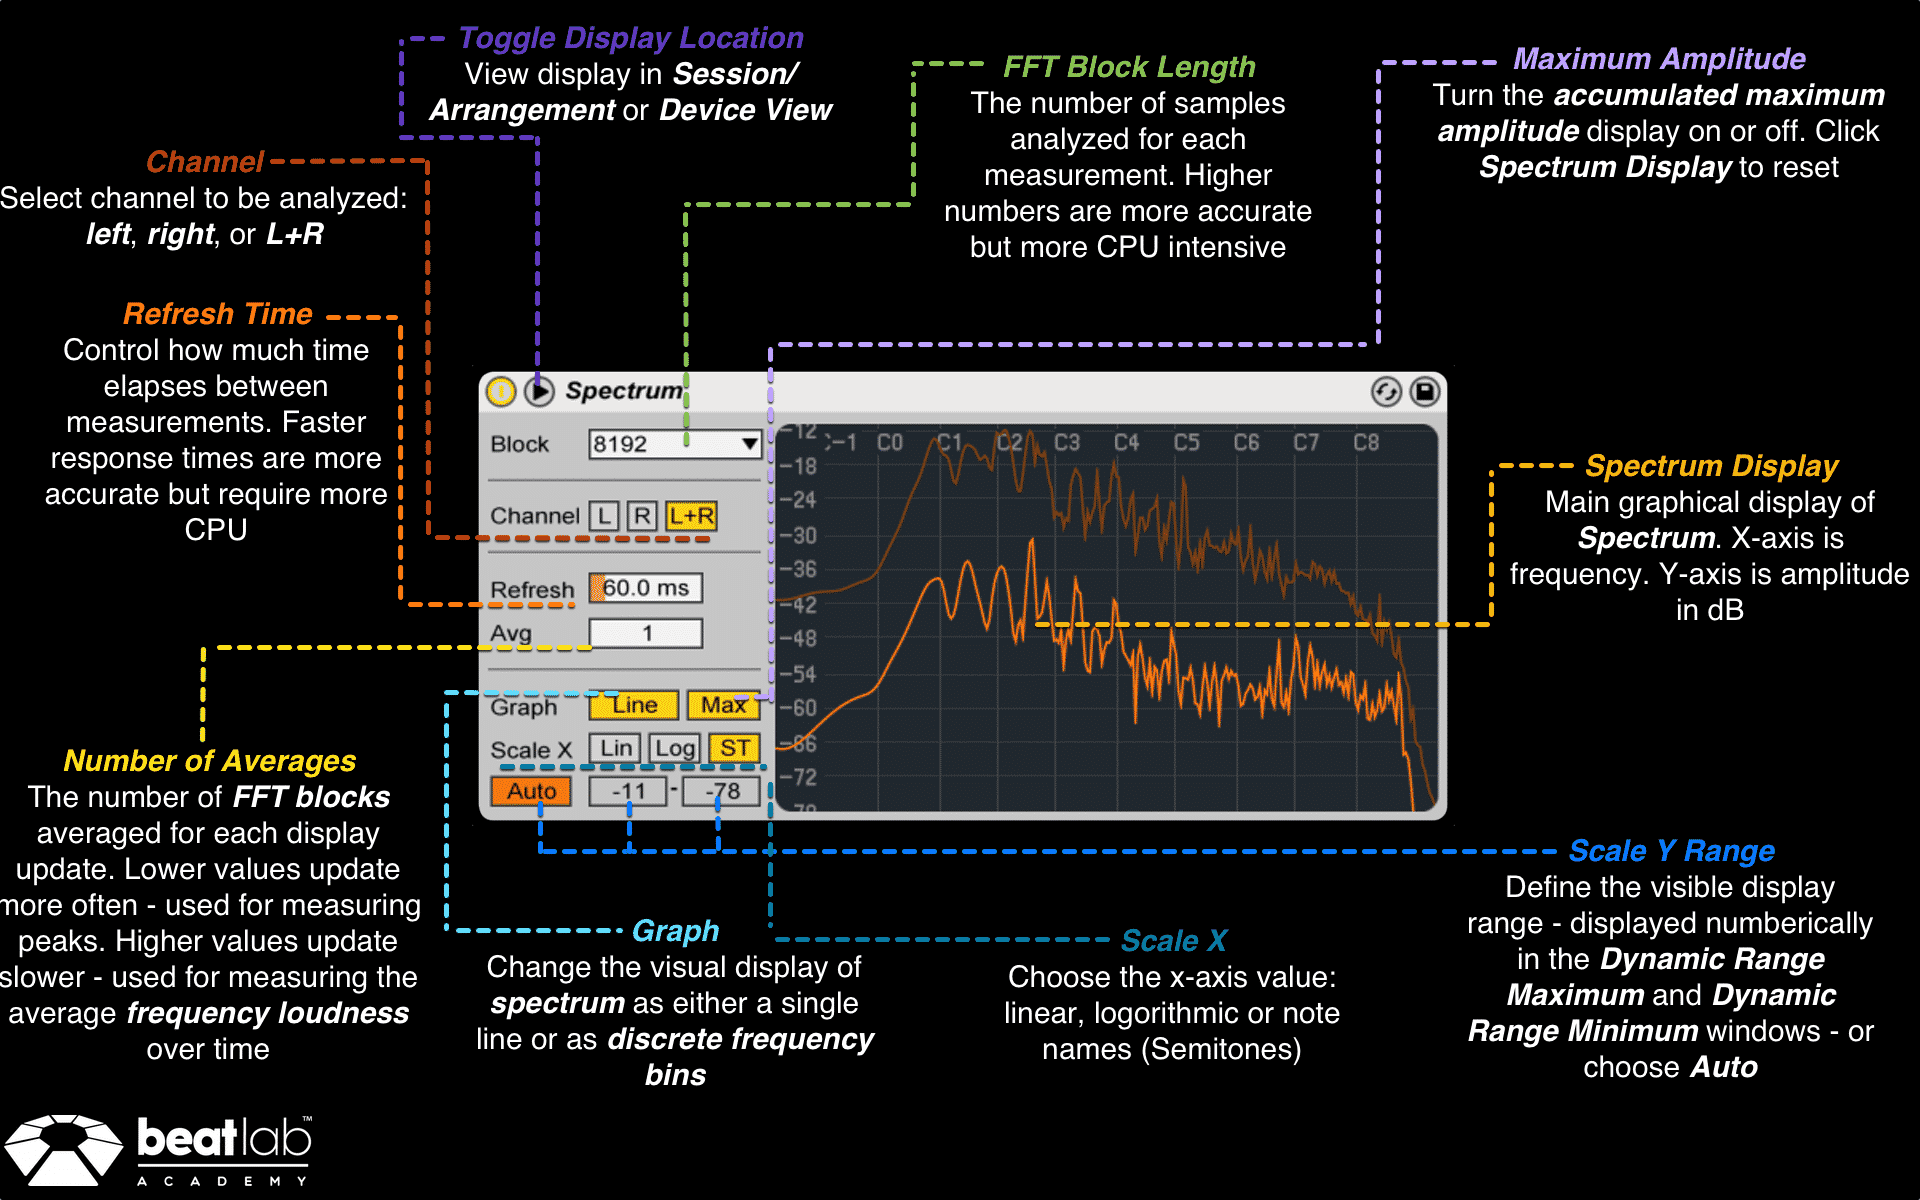
Ableton Spectrum Cheat Sheet (Free Download)
Ableton Spectrum Cheat Sheet (Free Download) Ableton’s Spectrum Analyzer is an essential tool for mixing/mastering engineers and sound designers. It can be somewhat confusing on how and when to use this meter so we thought we would release another free cheat sheet from our complete collection that we give our students in Beat Lab’s Certification Program. The spectrum will display the frequency response of any sound. This can show us the notes that the sound plays and any frequencies that might be too loud or too quite. We can then go and use EQs, Filters, compressors and other processing tools to change the frequency response of any sound or even our entire mix. You can also use the Spectrum to compare commercial track frequency response to your own tracks to make sure you competing in quality with the tracks in your genre. divider style=”clear” You can download Spectrum cheat sheet below. Be sure …
Read More
Best Way to Integrate Maschine & Ableton Live | Student Questions
Best Way to Integrate Maschine & Ableton Live su_youtube_advanced url=”https://www.youtube.com/watch?v=wmjeLqEftCo” showinfo=”no” rel=”no” modestbranding=”yes” https=”yes”su_video url=”https://www.youtube.com/watch?v=Fjb4U-cUGSE”/su_youtube_advanced Another student question video is up. For this one we also added a blog post so we can give you a step by step on how to set it up. Maschine is a very powerful sequencer but if you are an Ableton Live user it might be a somewhat complex to set them both up to work in best way. divider style=”clear” Multi-Out From Maschine First load Maschine to an empty audio track. Load a Drum Kit or make your own. Then switch to the Maschine’s mixer. 3. From here you can start routing each Pad to it’s own Ext. output. 4. In Ableton Live, Open 15 new Audio Tracks and select all of them by holding shift. 5.Change “Audio From” to Maschine and set the monitor to In 6. Finally …
Read MoreFeatured Masterclass


