


9 Ableton Live Fundamentals I Wish They Told Me Before I Started
We all start from the beginning when first using Ableton Live, and for the majority of us who start out alone, you may run into a few snags right from the start. Unaware of a few fundamental concepts and workflow techniques may prevent you from working efficiently, and may even cause problems in the future.
Here are a few tips and tricks to get you going in the right direction with Ableton Live so you can avoid some of my struggles:
1. Ableton Standard vs. Suite
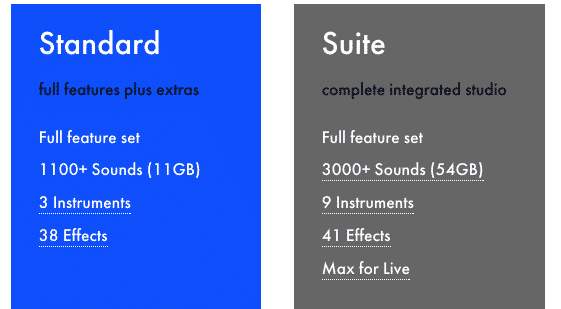
You can choose between two versions of Ableton Live; Standard and Suite.
In the Ableton Live Standard version, you will get fewer Instruments and Audio Effects as well as a smaller sound library.
The biggest difference between the two is Max for Live (which comes with Ableton Live Suite).
Max for Live is a completely different third-party software already built into Ableton Live, and it’s amazing.
With Max for Live, you get more features like Instruments, Audio Effects, MIDI Effects, Control Devices, Hardware integration and so much more. It even gives you the option to build your own devices.
Potentially, it can, and will solve any problem you encounter in Live. If Live lacks a certain feature, Max for Live can solve it. It simply allows you to control Live in ways you couldn’t before, and it also opens up the door to becoming a Max for Live programming nerd.
If you’re not sure which to purchase, the Standard or Suite version, I highly recommend going with Ableton Live Suite simply because of Max for Live.
Besides Max for Live, the Ableton Live Suite version comes with some really nice synths like Operator and Analog, along with useful Audio Effects like Amp, Cabinet, and Corpus. Suite also includes a killer Sampler.
Check out this full feature comparison list
*Beat Lab Students get 40% EDU discount.
[divider style=”clear”]
2. 32 bit vs. 64 bit Since of Ableton 10. Only 64 bit is available
In your Ableton account, you will have the option to download Live 32 bit or 64 bit.
So, which version should you choose?
Well, you don’t really have to make a choice. In fact, you can download both versions to your computer and use them as needed. Just don’t forget to manually rename one of the application files.

Ableton officially recommends using 64-bit version, mostly because that version can take advantage of more than 4 GB of RAM on your computer and will work more efficiently.
To check how much RAM you have on your computer, click the following appropriate link: MAC/PC
One of the main reasons you may not want to switch is if you have any plugins that only work in 32 bit.
The solution is to either continue using 32 bit until those plugins will be available in 64 or use a conversion plugin which will let you use 32-bit plugins in 64-bit environments. Check out these two options: jBridge or 32lives.
Overall it is recommended to use 64 bit. It is a better more efficient environment.
[divider style=”clear”]
3. The Interface Is Too Small/Large
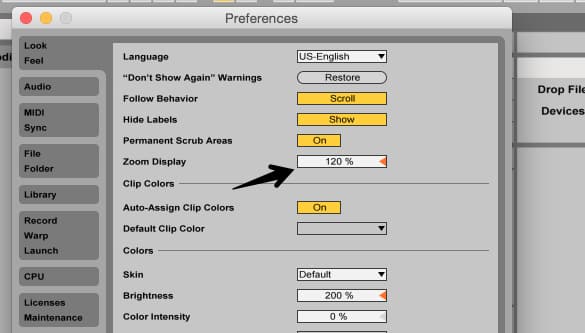
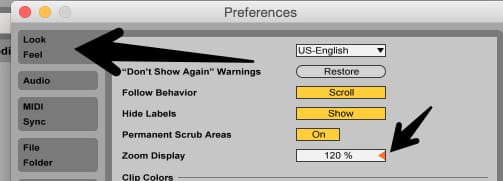
Thanks to Live’s minimalistic design, you can change the proportion of all the objects of the interface using the zoom display.
Locate the Zoom Display under the “Look Feel” tab in the Preferences window. (CMD+, or CTRL+,)
If you are using a second monitor you can click on View in the top menu bar and select Second Window (CMD+Shift+W, CTRL+Shift+W).
[divider style=”clear”]
4. Learn How To Use Ableton Live
Ableton Live can be as complex as you want, but can also be easy to use and is very intuitive.
Don’t let the minimalistic design scare you. Once you get the hang of it everything else “clicks” in place and will make more sense.
The first thing any new Ableton Live user should do is to open up the Info View (Shift+?) located in the lower left of the screen.
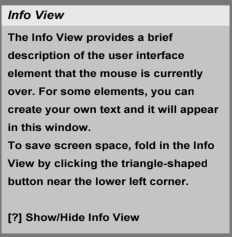
The Info View will display information just about anything you hover your mouse over. It’s the best little helper you can get in Live and can even teach you new tricks and tips on how to use anything in Ableton.
If you are not sure what a certain thing does or what it’s called in Ableton Live, just hover your mouse over it and look at the Info View.
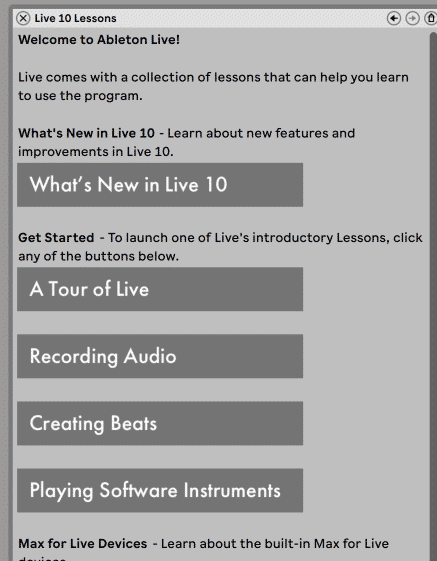
Next, click on Help in the top menu bar and choose Help View.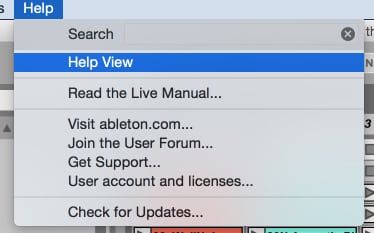
You will see a new box open to the right. Here you can access built-in lessons and learn the basics of Ableton Live. Most lessons also include a dedicated Live Set to give you an example of the lesson’s topic.
Here’s an in-depth resource to know everything about Ableton Live check out the well written manual.
Lastly, if you really want to become an Ableton Ninja check out Beat Lab’s Certification Program.
[divider style=”clear”]
5. Save Ableton Live Projects The Right Way
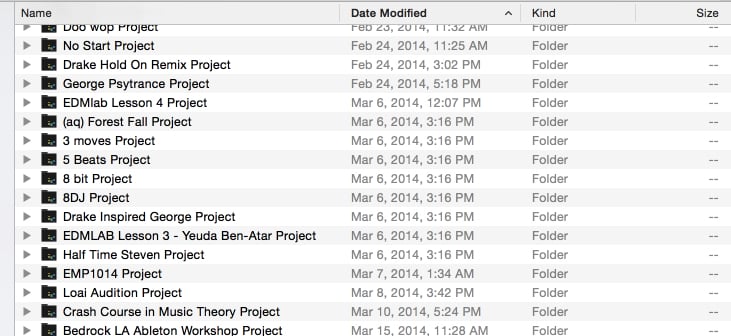
When I started out, I had one folder with all my Ableton Live projects. I thought each track I was working on were the .als files.
Turns out I was saving all my projects the wrong way and spent some serious time organizing them the correct way.
Let me show you how to correctly avoid this mistake.
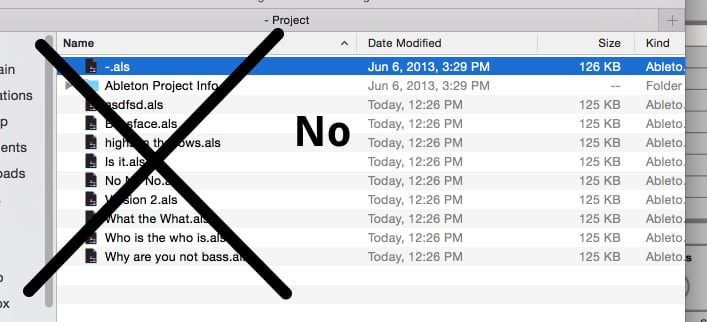
When you save a project for the first time you should always make sure you are saving it under a regular OSX/Windows folder.
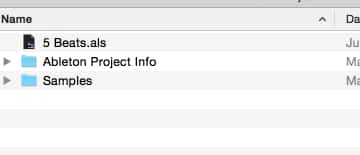
Create a folder somewhere on your computer and call it something like “Ableton Projects”. Every time you save a new project under “Ableton Projects”, Live will automatically create a special Ableton folder for the project. Inside the folder, you will find an .als file (Ableton Live Set), which is the actual project file. You will also find “Ableton Project Info” folder, which you do not need to touch, and you might also find a “Samples” folder with all the samples associated with the project.
Saving it this way will ensure ease of transfer when sharing projects or moving between studios.
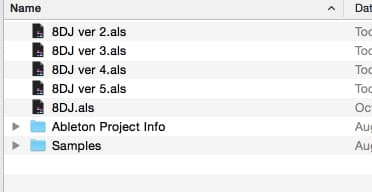
The only time you will need to save under the same Project folder is if you are saving multiple versions of the same track.
This way of saving projects are important for efficient workflow and to prevent potential problems.
[divider style=”clear”]
6. What Are All These .asd Files?
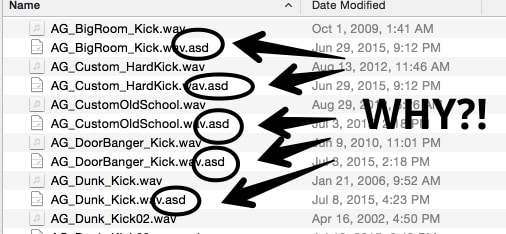
After you use Ableton Live for a while you might notice these strange new files appear on your computer. These files are Audio files like MP3s and Wavs. Although these are very small files, they might seem annoying and unnecessary.
They are sample analysis files and contain information so Live will be able to load them quicker the next time you use them. They might also hold saved Warp settings.
The most noticeable hassle is when you navigate to those audio files on your computer. After each audio file, you will see it’s .asd file with the same name. A quick solution would be to organize the files according to type.
You should not delete these files, and even if you do Live will create another one the next time you use that audio file.
[divider style=”clear”]
7. How To Custom Map Your Controller
 \
\
A great benefit to Ableton Live is the fact that it’s very friendly with MIDI Controllers. You can simply click on the MIDI button in the top right corner of Live and you will enter MIDI Mapping mode.
Here you can simply click on anything that is highlighted and then move a knob, fader, or hit a key on your MIDI controller to map that control to Live.
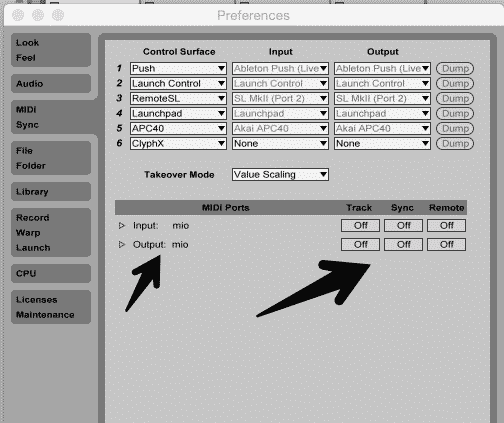
If this doesn’t work for you, go to the Preferences menu (CMD+, or CTRL+,) and click the MIDI/Sync tab.
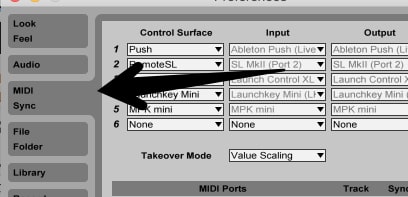
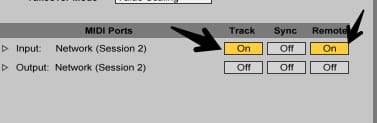
Here you should see your controller listed under “MIDI Ports”. You will see an Input and Output for your controller.
We will not go into too specific details about this, but to get everything working correctly, make sure the Track and Remote are on for the Input of your controller. This will let you play software instruments and use Live MIDI Mapping mode.
[divider style=”clear”]
8.How To View Multiple Plugin Windows
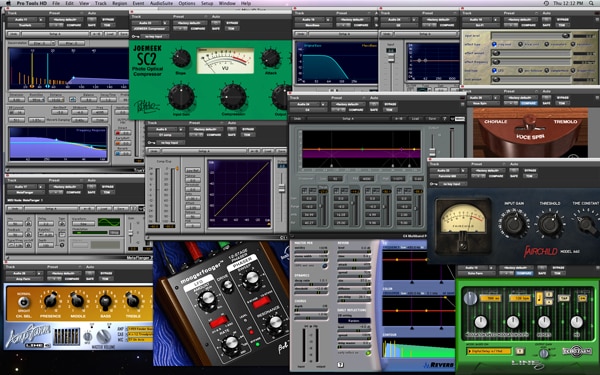
If not already, eventually you will use plugins to some extent. Plugins are third-party software that you can use inside Ableton Live that greatly expand the capability of your music production machine.
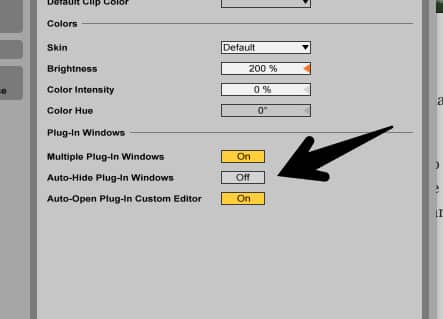
By default, you will not be able to open up more than one window plugin at a time. To fix this, go to the Preferences Menu and click on the Feel/Look tab. On the bottom, you will find the Plug-in Window section. Turn off the second option: “Auto-Hide Plug-In Windows”. Turning off that option will let you open up as many plugin windows you want even if they are on different tracks.
[divider style=”clear”]
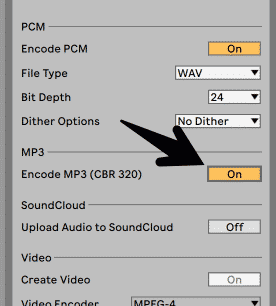
9. How Can I Export MP3 From Ableton Live?
You can’t. Yes, it is annoying. And yes, other softwares let you export to MP3.
* Update, Since Ableton Live 10 you can now export MP3s!!! yes!!!
The reason for it is this: MP3 ‘died’ and nobody noticed: Key patents expire on golden oldie tech.
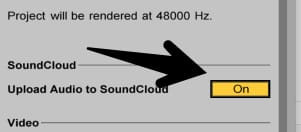
You can also upload directly to Soundcloud or use an online conversion service like: Media.io or Zamzar.
You can even convert from iTunes.
[divider style=”clear”]
Any essentials we missed? Let us know in the comments below
[divider style=”clear”]
WANT TO TAKE YOUR PRODUCTION TO THE NEXT LEVEL?

[divider style=”clear”]
Recommended Modules
[su_row]
[su_column size=”1/3″] [/su_column]
[su_column size=”1/3″] [/su_column]
[su_column size=”1/3″] [/su_column]
[/su_row]
[su_button url=”https://beatlabacademy.com/beat-lab-online-learning” style=”ghost” background=”#303133″ color=”#303133″ size=”12″ wide=”yes” center=”yes” radius=”20″ icon_color=”#303133″ class=”custombuttonsyeuda”]Beat Lab ONLINE LEARNING PORTAL[/su_button]
[su_button url=”https://beatlabacademy.com/blog/” style=”ghost” background=”#303133″ color=”#303133″ size=”12″ wide=”yes” center=”yes” radius=”20″ icon_color=”#303133″ class=”custombuttonsyeuda”]Back to Blog[/su_button]
Featured Masterclass


0 responses on "9 Ableton Live Fundamentals I Wish They Told Me Before I Started"